Tag Archives: advice

7 Tips for Using Word of Mouth Marketing

7 Tips for Using Word of Mouth Marketing: The Original Social Media

7-tips-for-word-of-mouthWord of mouth marketing (WOMM), or peer-to-peer marketing, is genuine, emotional conversations people have with their friends about your gigs and music. Creating this type of “buzz” is particularly effective for building a following in your local area. Think of WOMM as the original social media.

Unfortunately, few artists use WOMM as effectively as they could. The problem is that they become too focused on collecting fans, instead of connecting with fans. Having 10,000 fans who at one time liked a video you posted, is not nearly as effective as having 100 really passionate local fans who drive others to attend your shows.

Here are 7 tips for using Word of Mouth Marketing effectively:

  1. Make sure your music stands out. Engage with the audience and get them talking. Be a presence in their lives by keeping them up-to-date with your life both on and off stage. Strive to be exciting, outrageous, and exceptional, both on stage and online. Take time to interact with everyone who posts something about your band or comments on your social media site.
  2. Provide your fans with different ways to talk about your band and share their experiences with friends. Encourage them to post on your social media sites, and take lots of show photos that they can comment on. Provide them with hashtags to use. Ask them questions about your set list and latest gig to get a conversation started.
  3. Building a strong fan base that goes beyond “likes” requires a strategy and some insight about what type of fans your music attracts. What other things do they tend to be passionate about? A good WOMM strategy is credible, social, repeatable, measurable, and respectful. Never deceive your audience/listeners by claiming to be something you are not.
  4. Make your communications special and memorable. Use “trigger words” like “sneak preview,” “exclusive footage,” “new release,” and “never before heard.” Surf the Internet for other phrases that seem to generate interest and write them down to use similar phrasing in the future.
  5. Hold short-term contests and tease them with upcoming info to get them to follow you more closely. Ideas include: “Indianapolis gig will be announced on Monday,” “win a free music download,” or “like this post to be entered in a drawing for a backstage pass (or VIP seating.” Alternatively, send them a link to a free song download on your site and say, “If you like what you hear, please pass it along to a friend.”
  6. Humor, sex, or shock appeal can stimulate and accelerate natural conversations among fans. Do you remember the funny “United Breaks Guitars” song and video posted by Dave Carroll of Local 571 (Halifax, NS)? Alternatively, use Photoshop to put yourself on stage with a celebrity, or make some other interesting, funny, and unbelievable photos to post.
  7. Utilize journalists and other people involved in your local music scene to help spread the word. Send them press releases and keep them informed about your latest releases and major gigs. Develop a press kit with your bio and interesting stories about your band.
 

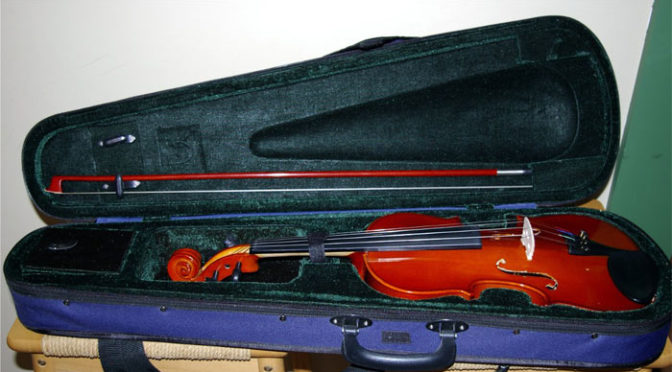
Travel Advice with violin case

Travel Advice From the AFM for Musicians Flying with Instruments

Making your Reservation

Ask for priority boarding. Request (or purchase) “zone 1” boarding, which will allow you early access to overhead stowage.

Inform carrier representative(s) that you are transporting a musical instrument. Carriers are required to inform passengers about any plane limitations and restrictions.

Rules relating to on-board stowage will apply to any instrument that meets FAA carry-on size requirements.

Packing & Carrying Your Instrument

Remove any sharp tools, like reed knives and end pins, and liquids that do not comply with TSA’s three-ounce regulation.

In case your instrument is not allowed in the cabin with you, be sure to have a proper travel case to avoid damage.

Board early: Overhead and under seat stowage is on a first come, first serve basis. Once an instrument is stowed in-cabin, it cannot be removed or be replaced by other bags.

Deal Calmly with Problems

If you are stopped by a flight attendant, calmly and quickly explain the precautions you have taken to prepare your instrument to safely travel in-cabin.

  • Be accommodating. Suggest placing the instrument in the storage area designated by gate and flight attendants.
  • If necessary, immediately ask to de-plane so that you can resolve this matter with airline supervisors.
  • Be prepared for the possibility that you may not be able to travel with your instrument in the cabin.

Study and follow guidance outlined in federal and air carrier online policy statements.

www.tsa.gov/traveler-information/musical-instruments

www.dot.gov/airconsumer/air-travel-musical-instruments

Performance Preparation

A Holistic Approach to Performance Preparation

“Feeling nervous before a performance is normal,” says Dr. Richard Cox, a musician, music educator, and psychologist at the Colorado School of Professional Psychology.


A certain amount of “concern” is probably good, normal, and useful, Cox continues, but anxiety is a physiological hindrance to good performance.

When the nervous system registers “anxiety,” it has already started the process of trembling, shallow or rapid breathing, perspiring, and stomach discomfort.

If these physiological symptoms are present, the first note will not be at its best. Cox suggests in his book Managing Your Head and Body So You Can Become a Good Musician that the psychology and physiology of anxiety can be greatly reduced by paying attention to these basics steps:

Mental Preparation

  • Anticipation–This is a matter of mind imaging. Close your eyes and visualize the music on the page, you with your instrument, the group or accompanist with whom you are playing, and the audience. Create a small picture show in the front of your brain. If you have a difficulty doing this, close your eyes, find a “center spot” in the middle of the inside of your forehead, and picture the entire situation as if it were a cartoon being shown frame by frame.
  • Relaxation–The body responds to anxiety by tightening up. If you have difficulty relaxing naturally, there are simple exercises that help. For example: Sit in a comfortable chair, or lie flat on a bed. Close your eyes. Breathe slowly and regularly, very deeply, and count slowly from one to 10, breathing in and out very slowly on each count. Talk to yourself. Tell yourself that with each breath you will become more and more relaxed.
  • Performing in your mind–By going through the performance step by step you can anticipate surprise feelings. It is very much like anticipating the next note when we play. The best way to play the next note correctly is to anticipate how it will be executed and how it will sound within the context of the last note and then the next several notes.
  • Center on the message–It is important to remember the message we wish to send to the audience. The audience will not remember the “wrong” notes nearly as much as they will remember the communication. Think through how the music will send the desired message. Then by keeping that message in mind, we can allow the technical performance to call upon years of practice and musical preparation. Many great musicians memorize the actual music straight from the printed page in their head, while humming it, and actually doing the fingering manually, then they put it all together in their mind, and only then on the instrument.
  • Center yourself–Get in touch with your emotions. If you are preoccupied, the music will show it. It is absolutely necessary to “get lost” in the music, otherwise you become a show person, not a musician. The “centering” technique discussed under Anticipation will work here. Deep meditation is also helpful as this aspect of mental preparation requires whole brain activity. You should be keenly aware of the intellectual and emotional demands upon you and the alertness and confidence you have stored up during practice. Fifteen minutes of meditation with relaxation, twice daily, is a tonic that cannot be equaled by medicine!

Physical Preparation

  • General health–Keeping one’s body in tone is essential to best performance. After all, the instrument is only an extension of your inner self. If you feel well physically, you will communicate better. It is surprising how many musicians abuse their bodies with inadequate exercise, too much caffeine, alcohol, tobacco, illegal and prescription drugs, and excess weight.
  • Nutrition–You are what you eat. Food plays a far more important role in good performance than most musicians acknowledge. Too much sugar, excessive caffeine, and excess fats are only a few of the things to avoid. Regular eating is difficult for professional musicians due to performance times, travel, and scheduling. However, it is important to keep your blood sugar level under control and within normal limits at all times.
  • Sleep–Loss of sleep produces serious effects. In fact, tiredness is only a symptom of the real problem–dream deprivation. When we do not sleep regularly, we develop sleep habits that skip important phases of sleep. One of these phases is the stage in which we dream. Dreams are essential for the repair of our entire thought process system. It also is particularly difficult for many musicians to obtain enough sleep before midnight. Research has shown that one hour of sleep before midnight is worth two hours after midnight. Some performers turn to medication and drugs to help them, but sleep that comes as a result of chemicals is not natural and does not produce the same beneficial results.

Other Considerations

  • Beta Blockers–All medicines are drugs and have both beneficial and harmful effects. Medicines containing beta blockers are used by some musicians to control stage fright. However, these medicines work by blocking certain impulses to the heart and can have profound effects upon the heart and nervous system that controls the entire cardiovascular system.
  • Other Medicines–The side effects of common medicines can dry you out (diuretics), make you drowsy (antihistamines), make you jittery (some cold and flu medications), cause nausea (some antibiotics), and some keep you awake. There are thousands of side effects of medicines you need to take into account. Medicines can also become a habit, both psychologically and physically. Be sure to discuss all the side effects of any medication you take, whether prescription or over-the-counter, with your doctor.
  • Doctors–Be sure your doctor knows you are a musician and understands that treatments and medications can effect your ability to study and perform. When undergoing surgery, if at all possible, request local anesthetic. General anesthesia puts the nervous system of the whole body to sleep and usually requires considerably more time to “bounce back.”
  • Dentists–If you are a wind instrument player, remind your dentist that your lips need to be treated gently. Even small changes in tooth structure, muscular ability, dry mouth, and myriad other considerations can effect your playing.
  • Your Brain & Music–Thinking about how your brain functions when you produce music will help you balance your artistic interpretation with your technical abilities. The two sides of your brain are called “hemispheres.” The left side is known for its analytical functions–putting the technical aspects of playing together. It is where we have logic and order. Right brain activity is emotive, artistic, romantic, and creative. Learning to truly listen to and appreciate what music does to the psyche and the soul is important to the right side of the brain. When the brain is functioning as a whole–connected by the structure that bridges the hemispheres, called the “corpus callosum”–you are in a great place to artistically perform with correct technique.
  • The Whole Person–The concept of wholeness, or holistic thinking, encompasses the mind, the body, and the spirit. It includes what you think, what you do, how you feel, what you believe, how you relate to others, and many other aspects of your total being. The concept seems rather esoteric at first, until you see how you fit into it. You cannot appreciate the role of music in everyday life, and your role as a musician, until you understand the meaning of the whole person. Once you grasp that concept it will be amazing how much easier it is to communicate with others and allow your music to touch the lives of others.

Adapted from Managing Your Head and Body So You Can Become a Good Musician, by Dr. Richard H. Cox, Colorado School of Professional Psychology Press, Colorado Springs, CO, 2006.

5 Sound System Mistakes

5 Sound System Mistakes Club Musicians Always Make

By Kent Ashcraft, Local 161-710 (Washington, DC)

5 Sound System MistakesMost engagements musicians play these days require some sort of sound system to amplify vocals, instruments, or both. Some musicians can afford to hire a professional sound company to transport and operate the equipment. If you’re one of them, congratulations; you don’t need to read the rest of this article.

However, if you are someone who runs your own gear, you may need this information. It’s been my experience that most musicians have inadequate knowledge of basic acoustical principles.

After all, sound engineering isn’t what you’re trained for. As someone with a good deal of practical experience and theoretical knowledge in this area, I have described the five most common mistakes musicians make when choosing and operating their sound equipment.

Mistake #1: Inadequate amplifier power. Most speakers come with a “continuous power handling” rating, expressed in watts. It’s natural to think of that as the maximum continuous power an amplifier can have in order to drive the speakers safely, and that using a more powerful amp will risk burning out the drivers.

Actually, the exact opposite is true. For technical reasons I won’t go into here, your speakers are more at risk if your amp isn’t powerful enough. Today’s speakers can handle a remarkable amount of clean power–the key word is “clean.” The higher the power rating of an amp, the more “headroom” it has, and the less distortion. I recommend using a speaker’s power rating as a minimum when choosing an amplifier to drive it.

Mistake #2: Mounting the speakers too high. Ever since the introduction of tripod speaker stands, it seems that many people have an urge to run them up to maximum height, thinking it somehow will prevent the sound from being too loud for the patrons. That’s what your volume control is for, not your speaker stands. Where the speakers are concerned, the basic principle is that you want the audience to hear them directly.

A typical speaker projects sound in a flattened cone pattern, about 90 degrees horizontal by 50 degrees vertical. You should visualize that coverage pattern, and mount the speakers so that the maximum number of ears are within it. Mounting the speakers eight feet in the air will generally result in most of the audience hearing only reflected sound from the room, which is much less clear.

Mistake #3: Trying to fix the room. Ninety eight percent of the rooms you will play in sound horrible. The bad news is that short of calling in contractors to rebuild them, there’s absolutely nothing you can do about it, and if you try, it will only make matters worse.

The good news is that the sound of the room isn’t nearly as important as you may think. Here’s why: Psychoacoustic research has shown that the human ear has the ability to separate direct from reflected sound, and that the brain will focus on the direct sound. It’s related to the phenomenon whereby if you close your eyes at a cocktail party, you can still pick out individual conversations around the room. So assuming that your speakers are mounted correctly, a person in the audience will perceive the direct sound of the speaker independent of the awful reflected sound in the room. If you try to notch out room peaks with an equalizer, you’ll make the room sound better by making the speaker sound worse, yet the sound of the speaker is what’s really important.

Mistake #4: Using EQ because it’s there. Mixing boards almost always include equalizers (EQ), which boost or cut specific frequencies. There are two reasons for this: One, there are rare occasions when you actually can benefit from them (mostly on instruments). Two, and more important, people are used to seeing them and therefore want them. And since they’re there, many believe they should use them.

The fact is that all microphones are designed to be heard with the EQ “flat.” If you buy the right microphones (as you should), they will sound the best with no EQ at all. Buying an expensive vocal mike and then boosting certain frequencies is like covering a prime filet mignon with ketchup. Ask any good recording engineer how he uses mikes in the studio, and he’ll tell you that he gets the sound he wants by mike choice and placement, using EQ only a last resort.

Mistake #5: Getting too fancy. If you’re running the system yourself, simpler operation is always better; after all, you have to play your ax as well. I don’t know how many times I’ve seen leaders do an extensive sound check before the gig, only to constantly fiddle with the controls on stage, making the sound progressively worse amid howling feedback.

If you use the same basic instruments and vocals on most of your jobs, you should only have to do one initial sound check, after which you should make notes of all the settings and leave them right there on future gigs.

The only thing that’s going to change is the room, and you can’t fix the room with the PA. Set all similar vocal microphones the same unless you have reason to do otherwise. If you’re running monitors, resist the temptation to use customized mixes for different people unless you have a compelling reason to do so.

In my experience, the most effective monitor mix is usually what is going into the mains, because it gives people the best sense of overall balance. The times I have heard people complain the most about what they hear from their monitors have invariably been times when multiple mixes are being used. Make it easy on yourself and keep it simple.

Running a sound system or obtaining good sound doesn’t have to be difficult. And certainly these are things you’re best off not having to worry about on the job, when you have clients to please, tunes to call, time to keep track of, and so on. If you avoid these five common mistakes, you will make your gig life easier, and your group will sound a lot better.

Protect the Product

Protect the Product: Don’t Skip the “Red Tape” of Union Requirements

by Patrick Varriale, AFM Electronic Media Services Division Director and Assistant to the President

Protect the ProductIn the old days, we would refer to it as protecting the tape, but with new technology, protect the product seems more appropriate. No matter what the terminology, it is as important today as it ever was.

It seems as if we have been writing articles on this subject matter since the dawn of time, but it is always worth repeating. When you are called to a recording session the first two questions you should ask are: 1) What type of recording project am I being called for? and  2) Who is the responsible party? Then, check to be sure the company is signatory to the proper AFM agreement, which you can do by contacting your local or the AFM.

The most common type of recording is a CD release. In that instance, you want to make sure:

1) That the company engaging you is currently signed to the AFM Sound Recording Labor Agreement (SRLA), or is a label under a major signatory, so that the recording activity of the record company is covered. (If the recording project is on a smaller scale, a limited pressing agreement may apply).

2) That an AFM B-4 report form is completed listing your services (guitar, bass, keyboards, etc.). If you performed overdub services, as opposed to doubles, you should be listed separately on the B-4 for each instrument. This will ensure that you receive proper payments from the Sound Recording Special Payments Fund for each of the next five years.

If your “product” is licensed for use in a new medium such as a theatrical motion picture, television film, or commercial announcements, you will receive the appropriate new use payments required by the SRLA. (See “Top 10 Reasons to Record AFM”). New use payments could end up being worth much more than the original scale payments you received.

Many times we hear that the musicians were advised to forgo the filing of a B form in an effort to get paid more quickly, rather than going through the “red tape” of union requirements. Believe me, the red tape is worth it to ensure that your services are properly covered.

We have heard many hard-luck stories from musicians who sometimes received more than scale “up front,” but now see their product being used repeatedly and are unable to pursue the extra payment that they would have been entitled to through the Federation’s process. Musicians who were victimized in this way tell us that they will never make that mistake again.

Here are a couple precautions pertaining to live recordings:

  • If you will be participating at a concert that will be recorded, you should contact the local where the live event will be held to see if a standard contract is in place to cover the live work. This is highly important because the live performance contract contains language that requires the “purchaser” to see to it that a written agreement is in place for the recorded performance.
  • Check the annual statement you receive from the pension fund to confirm that the work you performed is properly logged into the system. Check for any discrepancies and report them to the local as soon as possible. This will give the local and the AFM an opportunity to review inaccuracies and correct them. If you haven’t received this important statement because you have moved, please contact a representative of the pension fund and provide them with your current address.

Your product and artistry contributed to the recording. You should see to it that your valued services receive the optimum protection.

9 Tips for Success as an Endorsing Artist

by John Wittmann, Manager of Artist Relations and Education, Band & Orchestral Division, Yamaha Corporation of America

9 Tips for Success as an Endorsing ArtistMusicians performing at all levels consider acquiring endorsements at some point in their career. Some play with the idea; others move on it. Ultimately, it is the reasoning or motive behind one’s actions that determines success as an endorsing artist.

From the manufacturer’s point of view, endorsements are designed to help promote the credibility of a company’s instruments or accessories. They also exist to give the appropriate support to established artists and to help the company sell more instruments.


Ask Why

When someone tells me they want to endorse our instruments, I listen without interrupting until they are completely finished with their pitch. Then, after a long pause, I look them in the eye and say one word, which is one of the most empowering words in our language. I simply say “Why?”

The artist’s response will ensure or quell any interest on my behalf. If they continue talking about how good they are, or how close they are to signing that big record deal, or how we would be crazy not to sign them, then I invite them to send a package and end the conversation as quickly and politely as possible.

If, on the other hand, the artist tells me that they love our instruments, have found complete freedom in musical expression playing them, and indicate that they will continue playing them whether we sign that artist or not, I continue to listen.

Be Professional

It still amazes me to this day that musicians will apply to several manufactures at the same time. Consider the lack of credibility involved here. What does this say about their musical decisions? What they are really saying is that it doesn’t matter, musically, what instrument they play and that they are just looking to find the company which will give them more.

I know I speak for all musical instrument manufacturers when I say “get a clue.” If you want to be taken seriously in the big leagues, act like a professional, make a musical decision, and stay with it. If you want to be considered for a corporate, musical, and personal relationship through an endorsement, consider the following:

9 Tips for Success as an Endorsing Artist

  1. Cast a clear vision for yourself: know who you are; determine your own sound; devote yourself to music … the songs, the group, the sound, your students, and your career. When you are making a living playing music and have something to offer others, then move on to number two.
  2. Ask yourself why. Why are you asking for an endorsement? What are you willing to offer? What do you bring to the table that would matter? What attributes do you have as a person and an artist that would make you invaluable to a company?
  3. Do you have an established career in music? This is a yes or no question. Be realistic, as this is the real world. Some guidelines: How many thousands or tens-of-thousands of recordings were sold last year with your name listed as the main artist? Are you currently on a major tour? How long have you been in your current band or symphony? Of what college or university are you a faculty member? If you are still in college, stay focused on your music and forget about endorsements.
  4. In order to merit clinic support, you must be a great clinician. A great player is not necessarily a great teacher or clinician. This is an important point. Before you ask for clinic support, have 100 clinics under your belt and make sure that belt is a black belt in the art of teaching. It is important to the manufacturers that someone who calls themselves a clinician is indeed artful and effective at this work.
  5. Make yourself an expert on the company that manufactures the instrument you play. You should know its history, philosophy, current artist roster, and position in the market. If you want to be an endorsing representative of a company, you simply must know and respect who you would be representing before you approach them. Study the company’s website and determine how it represents its artists. Do you fit in with its roster?
  6. Establish rapport. Introduce yourself at trade shows to the company’s staff without presenting a package or even mentioning the word endorsement. We assume, if you are talking to us, that you can play. Remember, many of the people working for instrument manufactures are fine musicians. Many of them would surprise you if you ever heard them play. In the endorsement context, you need to present yourself as a business person. We want to know what it would be like to work with you.
  7. Prepare a well-crafted promotional package. Your package should include a short letter, a biography, a recording, a photo, and the URL to your website. Take time and have fun crafting this package; it is your first impression. Do some background work and be sure you’re sending it to the correct person–get the correct spelling of his or her name, as well as that person’s correct title.
  8. Don’t expect free instruments or to be paid money in return for playing a company’s instrument. Artist discounts will be discussed after your package has generated interest. Companies expect endorsing artists to play their instruments exclusively; to mention their companies at educational events; to thank the company for their support; and, when possible, to include the company’s name on recording materials. Individual companies may have other expectations beyond these, which will be discussed if they are interested.
  9. Keep focused on the music while paying attention to your sound and to your business skills. Music manufactures are, above all, interested in being represented by good, professional musicians who truly love the tools of their trade.

An endorsement relationship with a company is a privilege. It is a truly reciprocal relationship which is based on trust and great communication. Endorsements do not exist to propel anyone’s career. Rather your successful career will propel endorsements.

Air: The Life Blood of Wind Instrumentalists and Singers

by Donald L. Banschbach of Local 10-128 (Chicago, IL)

Whether you’re a wind instrumentalist or singer, you have probably heard the phrase “use your diaphragm” many times throughout the course of your career from teachers and fellow musicians. This instruction concerns the constant flow of air supported by the group of muscles that musicians and singers employ for optimal sound in their performances. To support air flow, singers and instrumentalists use forced inspiration and forced expiration of breath, essentially turning the human body into an air pump.

How It Works
Air pumps, like the human respiratory system, draw in air from the atmosphere and expel it into a container such as a balloon. The human trunk is divided into two large cavities, the thoracic cavity, which contains the lungs and heart, and the abdominal cavity, which contains the stomach and intestines. The diaphragm, a large dome-shaped muscle, separates these two cavities.

Using forced inspiration, the musician’s diaphragm lowers the floor of the thoracic cavity, while increasing the volume inside the cavity. At the same time the muscles between the ribs (external intercostals) elevate the rib cage. The dual action enlarges the thoracic cavity, sucking air into the tiny alveoli sacks filling the lungs with air—think of the action of an air pump with the diaphragm as the plunger.

At this point in the breathing process, the musician or singer is ready to force air through the mouthpiece or vocal cords. The human girdle (made up of the transversalis abdominis, external and internal oblique muscles) now forces the stomach and intestines against the lateral side of the diaphragm. This reduces the size of the thoracic cavity. Simultaneously, the internal intercostals (musculature between the ribs) lower the ribs, reducing the size of the rib cage. This joint action is similar to squeezing your hands together forcing the air out of a balloon.

Capabilities
The volume of air used for forced inspiration and forced expiration, is known as the musician’s vital capacity. This volume, measuring in cubic centimeters (cc), varies from clarinet player to tuba player or rock singer to opera star. Females generally average 3,000 cc of lung capacity and males 5,000 cc. Variations in vital capacity between individuals or across the sexes does not seem to hinder performance levels. However, a musician’s height, weight, and age can affect vital capacity. It is the general opinion of the medical community that regular physical exercise increases vital capacity. Forced inspiration and forced expiration, as used by wind musicians, increases the capacity. This exercise of the lungs increases oxygen in the blood stream, blows off carbon dioxide, and is a contributing factor to the health of the musician.

Avoiding Improper Technique
When the diaphragm is used correctly, the abdomen will project forward or push out, while the musicians inhales. A “heaving chest” occurs when a musician or singer fails to use the diaphragm properly. It is a sign that the diaphragm is not being used to full capacity since the breath will jerk the rib cage upwards instead of expanding the stomach. While this heaving action makes it possible for the musician to achieve some degree of vital capacity, there is a major problem with this type of breathing. The external intercostals, in between the ribs, are acting on their own and cannot achieve the airflow required for maximum musical performance. A formula for the proper muscle use in inhaling and exhaling might read as follows:

Forced inspiration = diaphragm + external intercostals assisting

Forced expiration = abdominals + internal intercostals assisting

To get a better sense of how to use the diaphragm properly, place the tips of your fingers on your belly and inhale. As you inhale, your belly should expand as the air enters your lungs and your fingers should feel as if they are moving away from the body. As you exhale, the belly should cave in and your fingers travel inwards.

Practice breathing, separate from when you are rehearsing music, to accustom the body to correct breathing for optimal performance.

protect your songs with copyright

Protect Your Songs with Copyright

protect your songs with copyrightThe songwriting process is rarely easy. Giving life to that creative spark is a process that can take countless hours, the behind-the-scenes toil never known to the audience that finally hears the song.

So, it’s important that all the sweat, anguish, and fine-tuning that turned your “kernel-of-an-idea” into a “track-on-an-album” counts for something. Even if your finished song doesn’t get shared with a wide audience, you should protect it nonetheless.

The act of copyrighting your work grants you, the owner, the exclusive right to have your work reproduced. Under the Copyright Act, protection starts the moment your songs are fixed in tangible form–recorded or even just scribbled down. The copyright then becomes property of the author and only the author, or those deriving their rights from the author, can claim the copyright.

With copyrighted works, you also have the privilege to: prepare derivative works based on your original tune; distribute copies of your work to the public, by sale, retail, lease, lending, or other transfer of ownership; and perform and display the copyrighted work publicly.

The more public your music the better, since as an artist, most of your money is made through the sale of your music, as distributed through a music publisher.

But lots more can be earned from paid TV and radio performances. But how do you ensure that you’ll receive the proper compensation if your songs are used in various media?

That’s where performing rights societies such as The American Society of Composers, Authors, and Publishers (ASCAP); Broadcast Music Inc. (BMI); and the Society of Composers, Authors, and Music Publishers of Canada (SOCAN) come in.

These are the organizations responsible for tracking when and where an artist’s copyrighted songs are broadcast, whether the exact track is used for background music in an episode of CSI, or if the next American Idol hopeful sings a variation of it.

This applies to international broadcast as well, in every country, save Russia and China, where copyrights are not honored. Every time your creation hits the airwaves, you’ll be compensated with a royalty check, delivered to your door every few months.

Your claim to copyright in the melody and lyrics of your songs can be registered with the Copyright Office. They usually require the copyright owner to deposit “two complete copies of phonorecords of the best edition of all works subject to copyright that are publicly distributed in the US, whether or not the work contains a notice of copyright.”

The proper form to register songs is Form PA (not Form SR). As long as all your music and lyrics are “unpublished,” you may register an unlimited number of songs together as a collection. This will extend the benefits of registration to each copyrightable selection in the collection.

Though not required, it’s recommended that you place a copyright notice on all your work. The notice includes the copyright symbol, the year of first publication, and the name of the copyright owner. Keep in mind, if your songs are published and distributed without a copyright notice, you’ll have relinquished your right to secure copyright and your songs would fall into public domain.

For more information on protecting your original creations visit the US Copyright Office at www.copyright.gov
BMI at www.bmi.com
SOCAN at www.socan.ca
ASCAP at www.ascap.com.

orchestral audition recording

6 Tips on Nailing That Orchestral Audition Recording

orchestral audition recordingAfter your résumé has been processed, you will probably receive material detailing how an audition tape should be prepared. Often specifications are very detailed, and you should follow them to the letter. If there is any doubt, call the personnel manager, but don’t phone him or her with trivial questions about details that you may have overlooked on the instructions.

Typically, audition tape instructions will tell you: what excerpts to record; the order to record them in; what recording equipment to use; what recording format to send (CD or tape); and how to label your recording. Beyond the technical and bureaucratic demands, there are several elements you should keep in mind when making an audition recording:

6 Tips on Nailing That Orchestral Audition Recording

  • Aim for perfection–this is your chance to showcase your playing to a hiring committee that must listen to many such recordings, so never send a recording that contains errors in tuning or timing. The quality of your playing should be matched by the quality of your recording–seek help with the technical side if you need to.
  • Choose the right environment–an empty concert hall will have too much reverberation; your bedroom will have too little. Good places to record are in a rehearsal room, classroom, or church hall. Make sure that the room is quiet and free from outside noise interference.
  • Choose the best equipment–Use the best microphones (condenser mikes rather than dynamic) and recording equipment you can get your hands on. If using tape, buy professional quality tapes with good noise reduction. Record in stereo. Set the microphones about 15 or 20 feet from you and about seven to 10 feet high. Check recording levels so you don’t peak at levels that cause distortion.
  • Experiment and practice–Give yourself plenty of time to make your recording as you will want to check recording levels and mike placement in addition to warming up and running through the excerpts. If recording over a couple of days, note where you placed mikes and equipment in case anything is moved in your absence.
  • Be Your Own Critic–Very often a committee will only listen to one or two excerpts of each tape, and switch off when a mistake is heard. You must be as critical with your own recording as the committee members will be. Play the excerpts in order when recording, stopping if you make a clear mistake but playing through minor lapses. Then play back, critique, and re-record till you have one good representation of your playing for each excerpt.
  • Do-It-Yourself–Professional recording studio rates can be high and often what they produce can be done just as well at home. It’s better to spend money on your own recording equipment (buying or renting) and learn how to do your own recordings–you may find you have a lot more fun this way as well!

9 Tips for Healthy Outdoor Summer Gigs

After a long winter of indoor gigs and stuffy practice rooms, you’d jump on any chance to finally play outdoors. But, before you head outside to enjoy these fun opportunities, take a little time to consider how to stay healthy in the heat and sun. Here are nine things to consider:

1) Venue review. Be sure to check out your stage ahead of time. Considering the time of day of your performance, will you be playing in direct sunlight, partial shade, or completely protected? Check what type of power supply is available at the venue and what precautions have been taken to protect the gear (and yourself from shock) in the event of sudden storms. Also, will there be electrical fans provided, or could you bring your own?

2) Gear check. To reduce the possibility of electrical shock when playing in an outdoor environment, always check your equipment beforehand. Replace any cables, particularly mains, that have nicks or look tattered.

3) Great covers. Ideal clothes for an outdoor gig are sun protective, light in weight and color, loose-fitting, comfortable, and can wick away the sweat. If your fabric offers little sun protection, consider using an additive like Sun Guard, which increases the ultraviolet protection factor (UPF) of any clothing for several (up to 30) washes. Wear layers if the temperature is likely to change. If you will be in direct sunlight, wear a hat—preferable one that will shade your head and the back of your neck.

4) Lather up. Apply sunscreen before you arrive to all skin not covered by UV protective clothing. The US Food and Drug Administration recommends Broad Spectrum sunscreens with SPF values of 15 or higher. It should be applied 20 minutes before you head outside and reapplied at least every two hours, more often if you’re sweating. Use a “sports” sunscreen that is waterproof so it doesn’t run off your skin and into your eyes. Don’t be fooled into believing that your facial makeup’s SPF protection is enough to protect your face. You would need seven times the normal amount of foundation to get the SPF factor on the label.

5) The right shades. Don’t forget your sunglasses. Time spent in the sun without eye protection can lead to eyestrain, as well as long-term eye diseases such as cataracts. Be sure to read the labels when purchasing sunglasses. They should state that they block at least 99% UVA and UVB radiation, or look for the phrases “UV 400 protection” (block light rays with wavelengths up to 400 nanometers) or “meets ANSI Z80.3 blocking requirements” (standards set by the American National Standards Institute). Polarized lenses cut down on glare, but can actually make it more difficult to read iPads or other screened devices. Wraparound glasses offer the best protection, but at least look for a pair with lenses large enough to go down to your cheek bone and wide temples to protect side exposure.

6) Hydration, hydration, hydration. The human body is 66% water, while the muscles are up to 75% water and lungs are 90% water. If you are sweating on stage, you are probably losing between 0.8 to 1.4 liters (roughly 27.4 to 47.3 oz.) per hour. So pack a small cooler of water bottles and keep one within reach at all times. Avoid alcohol, sugary, or caffeinated drinks. For prolonged or heavy sweating, you should also keep a sports drink handy to also replace electrolytes.

7) Plan ahead. If possible, plan your performance so that you limit your time in the sun, especially between the hours of 10 a.m. and 2 p.m., when the sun’s rays are most intense. If you want to wander around the festival or watch other performers, try to stay in the shade before your set. Also, don’t overdo it. Make sure you have adequate breaks in your set, and scope out a cool, shaded place to take them.

8) Healthy eats. Eat a healthy meal at least one hour before your performance is to start. Include plenty of fresh fruit and vegetables, and avoid the salty, high-fat junk food found at most concerts and festivals.

9) Listen to your body. If you feel thirsty, you are not drinking enough water. A headache is also a warning sign that you are becoming dehydrated. Light-headedness, confusion, nausea, cramps, rapid heart rate, and profuse sweating are symptoms of severe dehydration. Get out of the sun and seek medical care immediately, if they do not go away.